If you are eager to know how to fix blinking white light on Verizon Router, then you have come up to the right place. All you need to do is read the blog until the end to learn the effective ways to fix the blinking white light on Verizon Router. Or, to know about Verizon Router Blinking White (Causes & Easy Fixes) and
What does the Blinking White Light Mean on a Verizon Router?
The meaning of the blinking white light on a Verizon Router is that it is boosting up. The solid white light in the router means that your router has successfully booted up and is ready to send and receive a wifi signal. Whereas, if the router has a fast blinking white light continuously, it is rebooting or is in a self-diagnostic mode, which happens via firmware upgrade or hard reset.
Moreover, the Verizon Router gets stuck with a blinking white light in case of a limited or slow internet connection. Furthermore, if the router continues to blink while there is no internet connection, it means that your router is facing issues connecting or syncing to the FiOS network.
Why is My Verizon Router Blinking White?
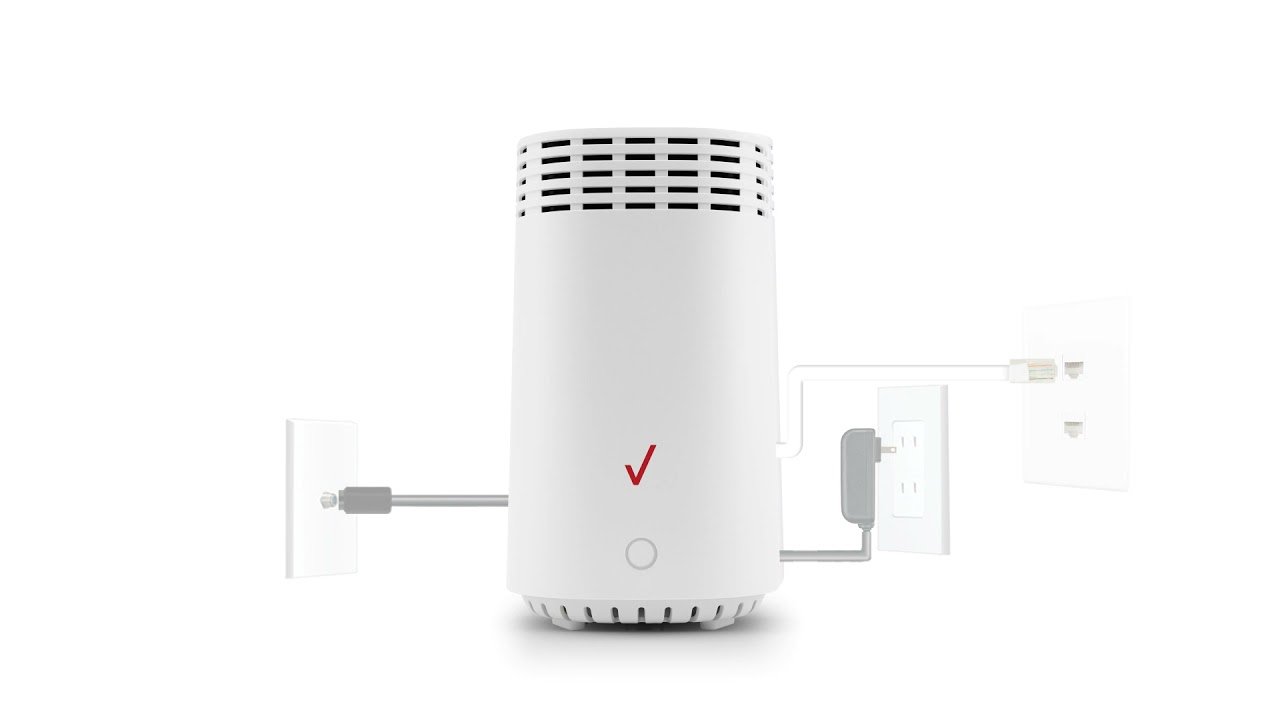
One common reason Verizon Router is blinking white is that the router might be unplugged first and then plugged back. This way, it reset the router and made it go through the booting process again.
The other reason Verizon Router is blinking white is the bad internet connection or a problem with the router itself. However, white light only takes place only when the router boot up. So, if your internet is working properly, the router probably has just a detective LED light.
How to Fix Blinking White Light on Verizon Router? (12 Solutions)
Below are the ways to fix blinking white light on Verizon router:
1: Update the Router’s Firmware
If you are still facing internet issues, try updating the router’s firmware. So, if you have the latest firmware version, 3.1.1.27, this solution will surely solve your router blinking white light issue. To do so, follow the following steps:
Step 1: Open router 192.168.0.1 or 192.168.1.1 in the browser tab.
Step 2: In the username field, make sure to enter admin.
Step 3: Now, enter the WebGUI password. It is placed at the back of your router.
Step 4: Open system settings.
Step 5: Lastly, click on the check for update or check for FTP OTA.
Note that if the firmware version is available, it will launch the updates. It is worth mentioning that all the routers will not allow or permit access to the admin WebGUI dashboard.
2: Check for Outages in Your Area
Make sure to enter your address in order to check out if there is an outrage in your area. A sit might cause connectivity issues to your router. In this case, wait a while and let it be resolved.
3: Reboot the Router
Unplug the router’s power cord and let it rest for about 5 minutes. After that, plug it back in and power it up again. This way, it will reboot your router.
4: Hard Reset the Router
For 30 minutes, make sure to hold the button down on the back and then leave it for almost 15+ minutes. This way, it will clear out any changes made to the startup file and load the factory config file.

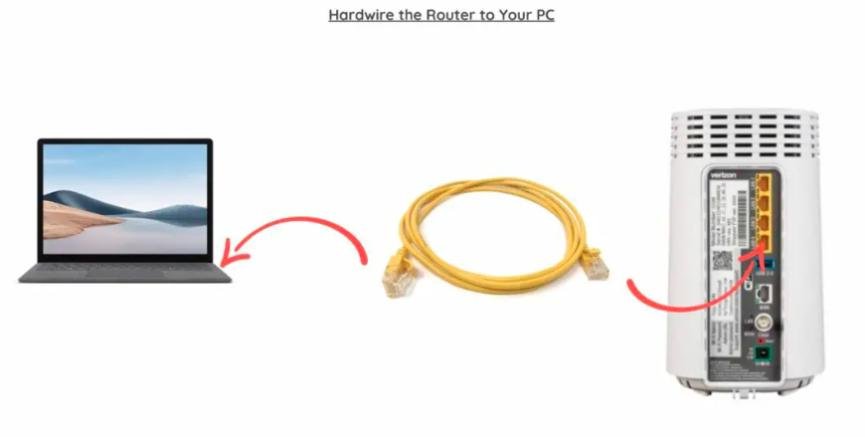
5: Hardwire Your Router to the PC
Connect your Verizon router using an ethernet cable to your PC. Make sure your wire connection is not faulty. If it is, then replace it as soon as possible to work properly.
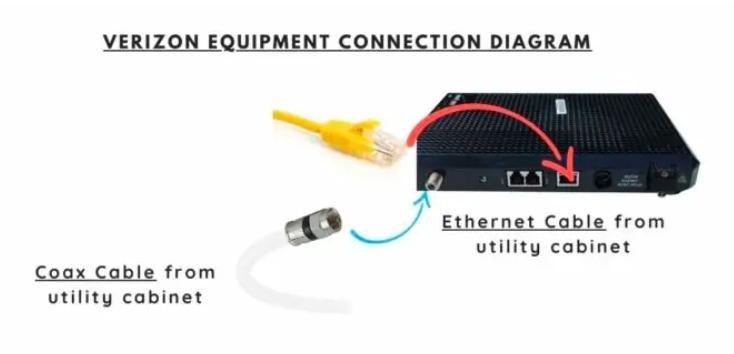
6: Reboot ONT, Replug the Ethernet and Coax Cables
Unplug ONT (Optical Network Terminal) from the power supply and then disconnect the ethernet and Coax cables that go into ONT. Make sure to check out the cables for any damage and clean the F connector of dirt and corrosion on the Coax cable. Replug the ethernet, Coax cables, and power supply. Remember to reconnect and Coax cables from the wall outlet to your router.
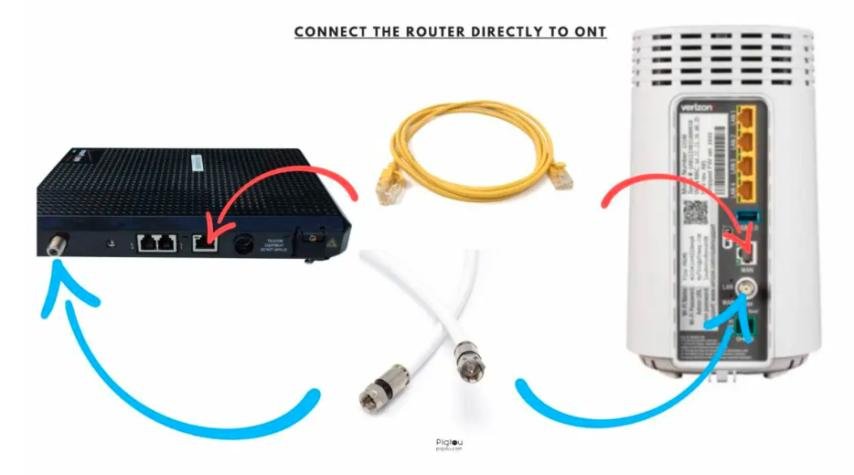
7: Test Your Router by Plugging it Directly into ONT
In this step, disconnect your router from the wall outlet and then plug it directly into ONT. If your router does not connect properly, your wall outlet is not active; therefore, understand that the ethernet or Coax cables in your apartment or home are damaged. So, it needs an independent technician to fix your in-house wiring.
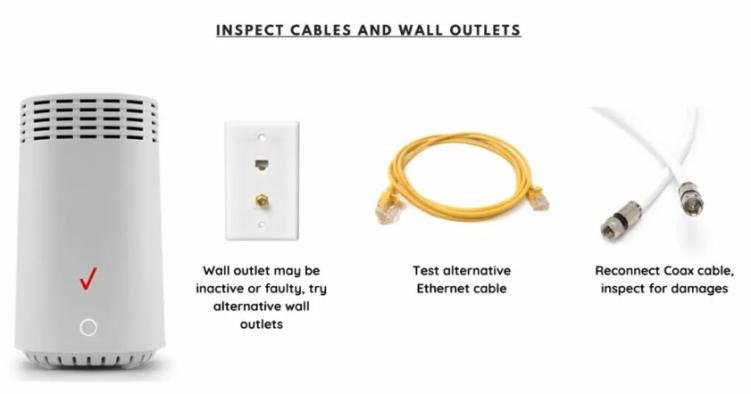
8: Test a New Ethernet Cable
Plug it into the wall outlet along with your router. If a Coax cable is used in your setup, reconnect it and check it for damages. If you are about to replace your router with a new ethernet cable, make sure an ethernet cable properly connects it. Because older verizon routers only required a Coax cable.
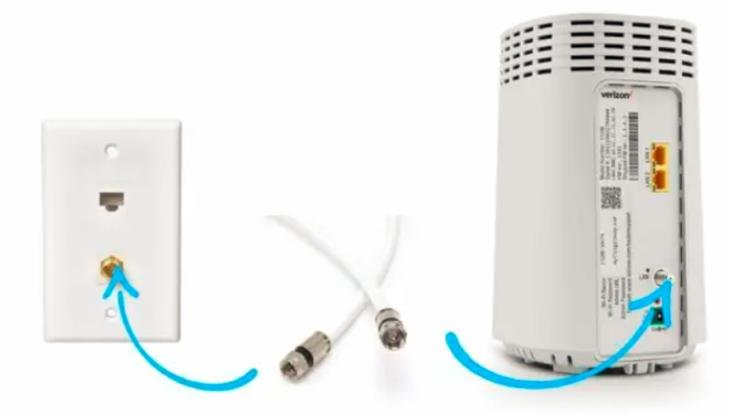
9: Verify Cables are Connected to the Right Ports
It is worth mentioning that all the cables should be plugged into the correct ports. If the router is not connected properly, then it will not be able to get a signal. Make sure to verify your setup is connected.

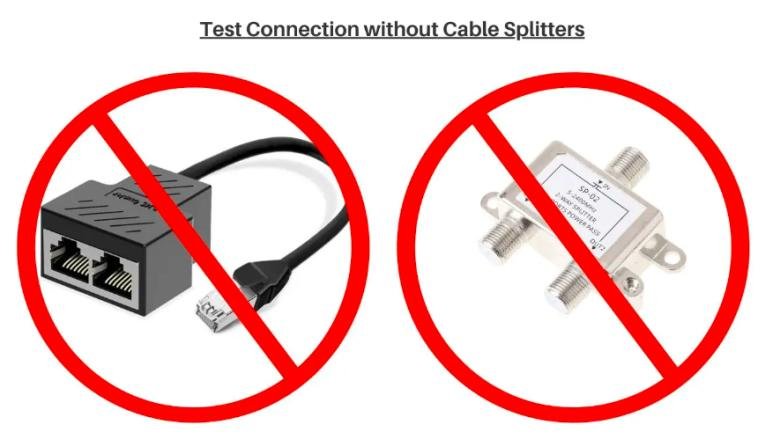
10: Remove Cable Splitters
In this step, make sure to remove cable splitters on ethernet and Coax cables and check out if you receive a direct connection. It is important to mention that there should not be more than one splitter on the line.
11: Try Another Wall Outlet
If any wall outlet in your home or apartment is faulty or inactive, plug your router into the alternative wall outlet and check out if it connects.
12: Replace Your Router at a Local Verizon Store
If your router is still not working properly, then you take it to the nearest Verizon store for a better replacement.
Conclusion
The blinking white light on a Verizon Router is when it is boosting up. The solid white light in the router means that your router has booted up well and is ready to send and get a wifi signal. In case it has a fast blinking white light continuously, then it reboots or is in a self-diagnostic mode, which happens via firmware upgrade or hard reset.
So, the blog has covered all the needed information and ways how to fix blinking white light on Verizon Router. So, read the blog carefully then you will be able to sort out the issue if you are facing it. Visit our website Qnnit for more such informative blogs. Have a look at these blogs in order to increase your knowledge: Basic reasons for partitioning the hard drive of your computer and How to Fix Hulu Keeps Logging Me Out [ Easy Fix ]