
Introduction:
The Shattered Throne delivers new content for gaming enthusiasts who love taking up new challenges. This throne resembles a mini raid and can be completed by a team of three. Once you complete all the tasks and overcome each obstacle, the triumph is yours.

It is important to know that the enemies you will encounter towards the end of this mission are in the region of 590 Power. Hence, we recommend at least one player in your team have a reign of power similar to or above.
Destiny 2: Forsaken – the Shattered Throne:
Below mentioned is a step-by-step guide for completing this mission and safely crossing all the dungeons:
Entrance:
Here are the steps you need to follow in order to reach the first dungeon of this mission:
- Firstly, go near the Oracle Engine
- Head to the Confluence
- You are required to pass the Confluence
- Then, move downwards the elevator shaft
- Turn right and pass through the corridor
- When you are done passing through the portal, make your way to The Confluence
- There you will find a giant portal
- You will find the quest marker for The Shattered Throne, which says: Strike back at the curse that plagues the Dreaming City
- After getting transported to Mara Sov’s throne world, you will see a Hidden Death Triumph sign popped up
- You are now at Destiny 2’s first dungeon
The Dungeon:
You will notice that the first part of the dungeon is straight, requiring you to move from one platform to another. On the move, you will find your first group of enemies in a place called the Labyrinth of Erebus. Fight with Labyrinth Architect here to move forward.
See the spawned symbol in the video. It represents an eagle (a different icon may appear each time). This will designate where your direction needs to be next. Follow the path and fight with the next enemy of Architect.

To simplify any confusion at this part, you are just required to follow the spawned symbol and kill each group of enemies you face. Afterwards, you go to the next spawned symbol. Continue the whole process until you pass through the whole lot of it.
You will find the icons engraved on the wall in a large circle. That symbol will be visible to you when you’re at the right place, confirming your game progress. After repeating this a couple of times, follow the final symbol and return to the same main room where you first entered. From there, you are required to move to the next area.
You will find a powerful gear item, a loot drop, here. Direct towards the descent. You may find a few enemies in linear with the descent. Follow the path down and make your way back.
After passing through a walkway next, a few Hobgoblins will try to attack you. Be careful and use the cover. When you see a dead-end next, move up the stairs and find the room with narrow beams.
This part will require a bit of focused attention. You will need to send one person on the first beam to lure the Ogres and head back towards the platform to fight with them. The goal is to reach the end. There will be some Orbs blocking pathways. Hence, you can expect some time to be consumed here.
Slowed Debuff:
Traverse the large doorway with a black field across it. Here, you will get Slowed Debuff, which means the power of the double jump won’t work here. You are required to pass speedily through this area, ensuring you are taking care of the enemies. Pass through the area and jump where required while you reach the other side. Cross the chasm now.
This part is easier than the previous one. Fight your way through any enemies popping up. Keep continuing till you face the first Boss in Eleusinia. Giant Orge will be in the middle of a room surrounded by four plates, and some wizards called the Keepers of Petitions around him.

After killing them, an orb will appear. If you pick that Orb, you will get a bluff called Petitioner’s Mark. Be careful. If the timer on it gets zero, you all will die.
The way to work your way through this is: Picking up a new orb resets the time. Pick up the Orb and stack it up. After collecting the fourth one, bluff will change to Petitioner’s Burden. Go to one of four plates, and take down the Orge’s shields by dumping the orbs.
This process must be done a few times with several damage phases. If your power drops to 570, it is suggested that all the enemies be taken care of, and you should leave the wizards. The reason being you won’t be at the mercy of your timer. When everyone else is down, now take down the wizards. Keep in mind that this is not a raid. You can take as much time as you want.
After defeating the Orge, you will need to make an offering. To go to final Boss, take a few lifts leading you towards a more linear path straight to the top.
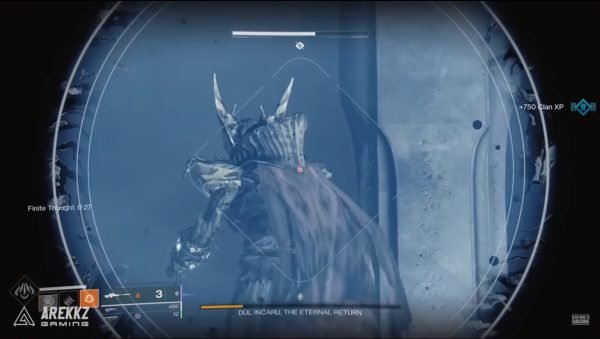
The Eternal Return:
The new objective is to face Dȗl Incaru, the Eternal Return, and Ba-Kuur, Fatesmith of Incaru. You can only damage the Boss when you have the bluff on the timer because the shield is working here. Be careful of the timer running out. If it does, you die. Jump on the pedestal in the middle of the room. That’s the only way to remove the bluff.
Knights may become difficult to defeat as they will get their immune shields. Look at the large crystal behind the wizard. If you shoot it, shields will be removed. Now, defeat them and focus back on the Knights and the Boss.
Towards the End:
For warlocks, it would be wise to use their Well of Radiance here, as well as any party members having a powerful shotgun to deal damage at close range while in the Well and a good sniper rifle. You will get a reward of powerful gear on defeating the Boss. Gear will ideally be above the 570 Power mark.
Conclusion:
Destiny 2 has become a famous game among people worldwide. People love this game for the unique adventure and thrill it embodies. Knowing the map of this game beforehand gives its players a slight edge while indulging in this game.
This blog presented a complete guide describing how to cross the dungeon in this game. Visit our website Qnnit to read more informative blogs such as GPO Private Server Codes and Chapter Redemption Codes.


