If you are looking for the Mortal Shell – Maps (Chests, Inscriptions, Bosses, Camps, Weapons, POI), you have come to the right place. As detailed maps are created by AndresofAstora, revealing secret temples, hidden inscriptions, formidable bosses, and unique weapons. So, whether navigating the twisted halls of the Crypt of Martyrs or delivering the shifting landscapes of Dim Gate, these Mortal Sheel maps will surely help you out through a shattered world.
Mortal Shell – Maps Guide
Below are the maps guide for Mortal Shell:
1: Tutorial Area
Beating Hadern is not important for advancement in the game. However, the player will be rewarded for doing so.

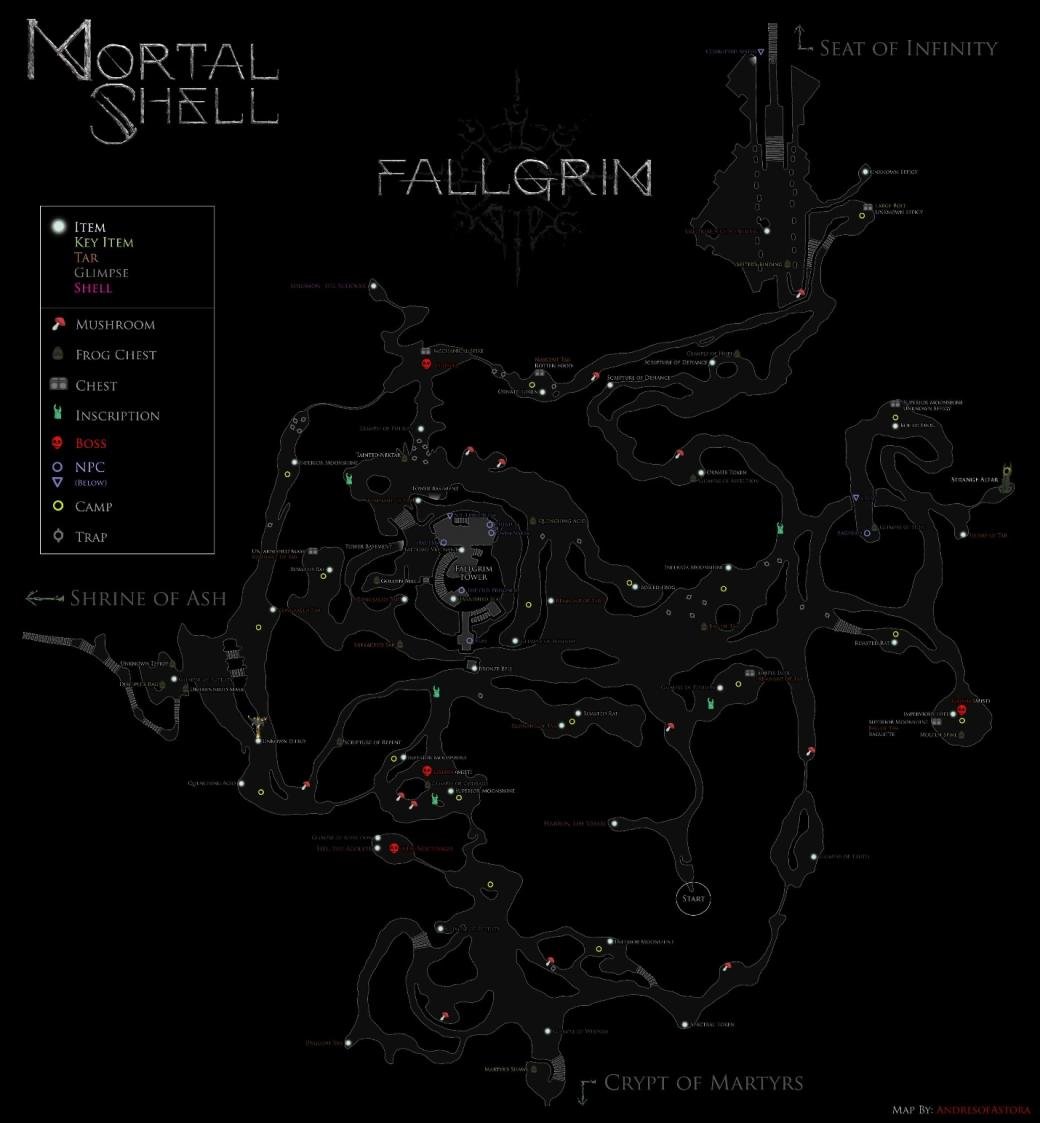
2: Fallgrim
- It is vital to mention that the Sester Genessa NPC is situated in the tower basement.
- Thestus NPC appears after getting your first Gland.
- Twin-Sister NPC appears after buying Virtuous Cycle DLC.
- Frog Chests unlock after getting your first Gland (when mist is present). Thestus can toggle the mist in exchange for Glimpses.
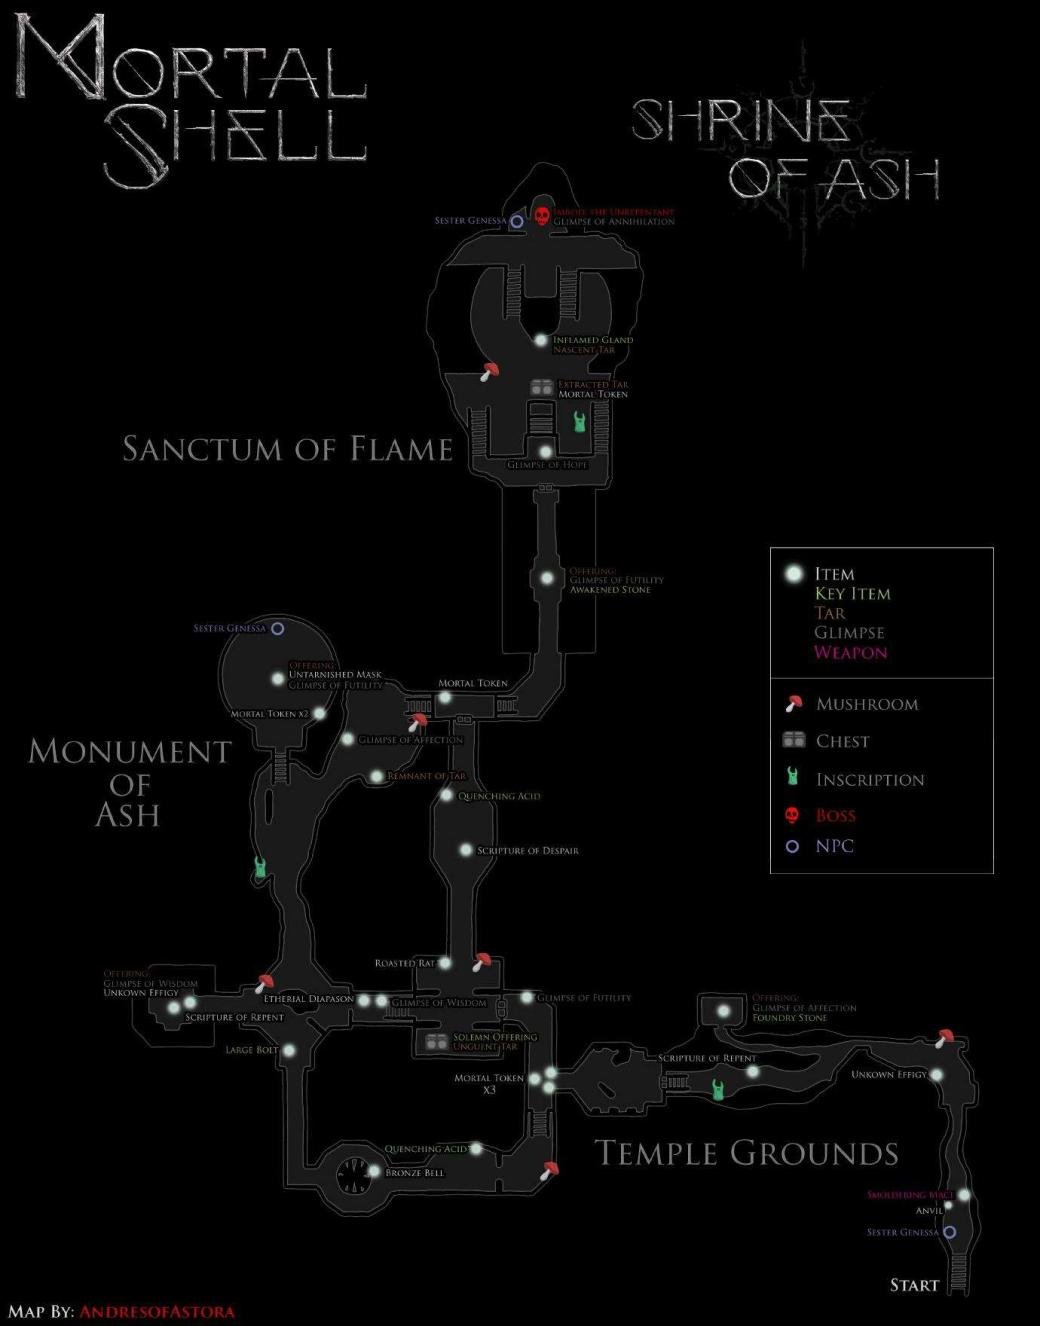
3: Shrine of Ash
- There are a few doors locked and opened from the other side
- You can figure out the Chest, and Inscription on the lower level of the Sanctum of Flame
- Make sure to drink the Nektar in order to be transported to the boss arena
- It is worth mentioning that the area will be changed slightly after defeating Imrod, the Unrepentant. (Areas blocked, more enemies, and previously locked doors can be opened, identifying shortcuts back to Fallgrim
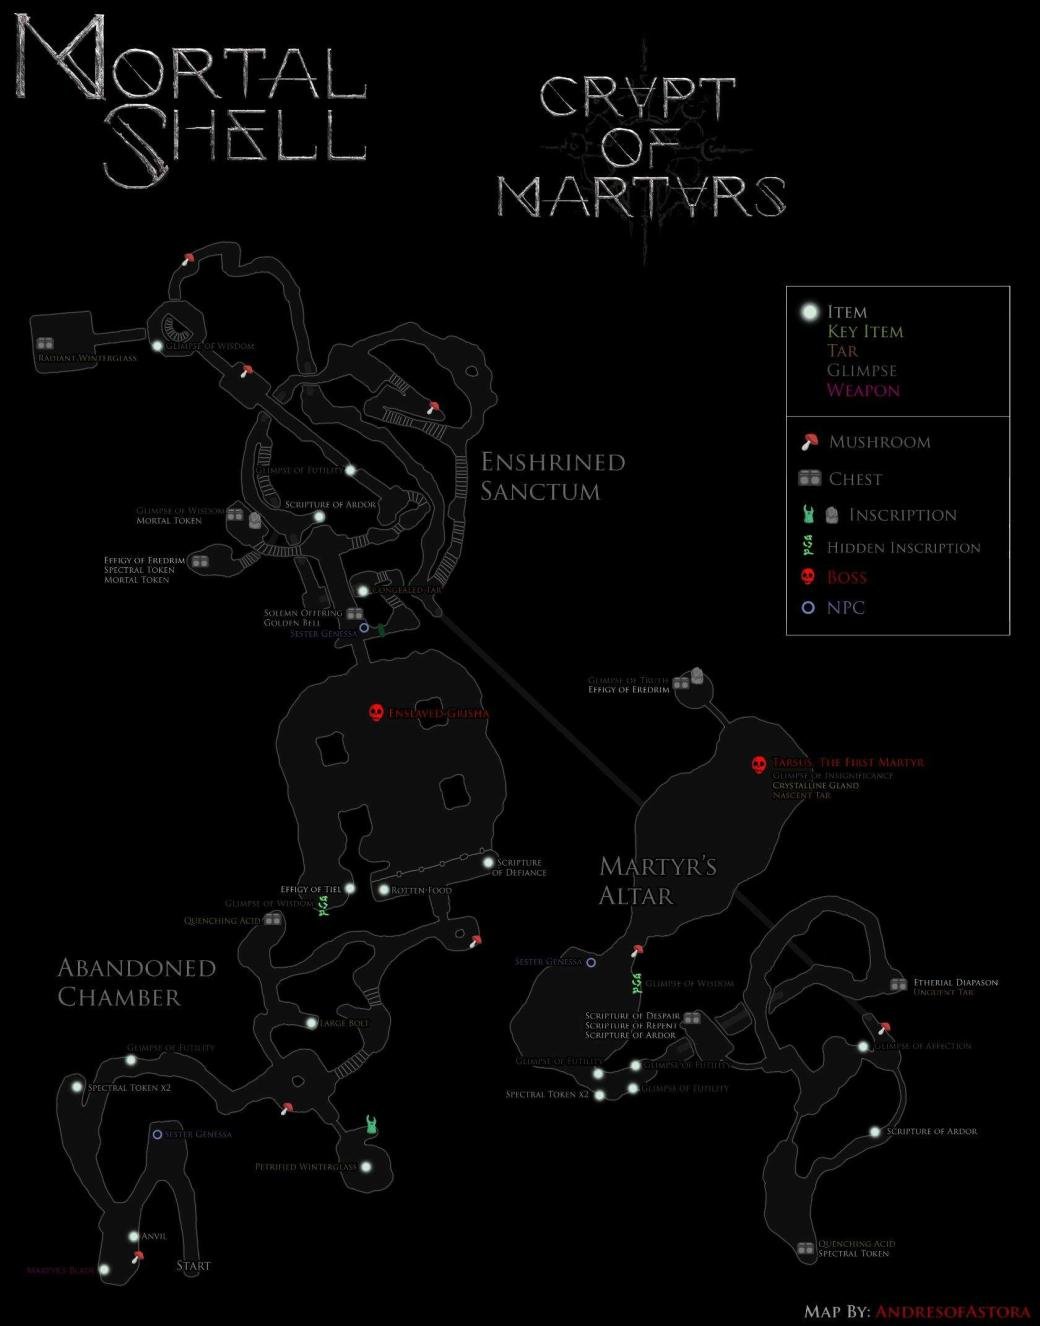
4: Crypt of Martyrs
- You can open the door by second Genessa from the other side.
- There is a small drop into the Enslaved Grisha fight that you cannot return until and unless defeating the end boss.
- This dungeon has hidden inscriptions (see legend). So, make sure to hit the wall in order to identify them, and you will also get a Glimpse of Wisdom
- It is pertinent to mention that the dungeon changes slightly after defeating the end boss. Therefore, on your way out, just stick to the major stars up, and figure out the following newly placed items:
x1 Remnant of Tar
x1 Congealed Tar
x1 Slurry of Tar
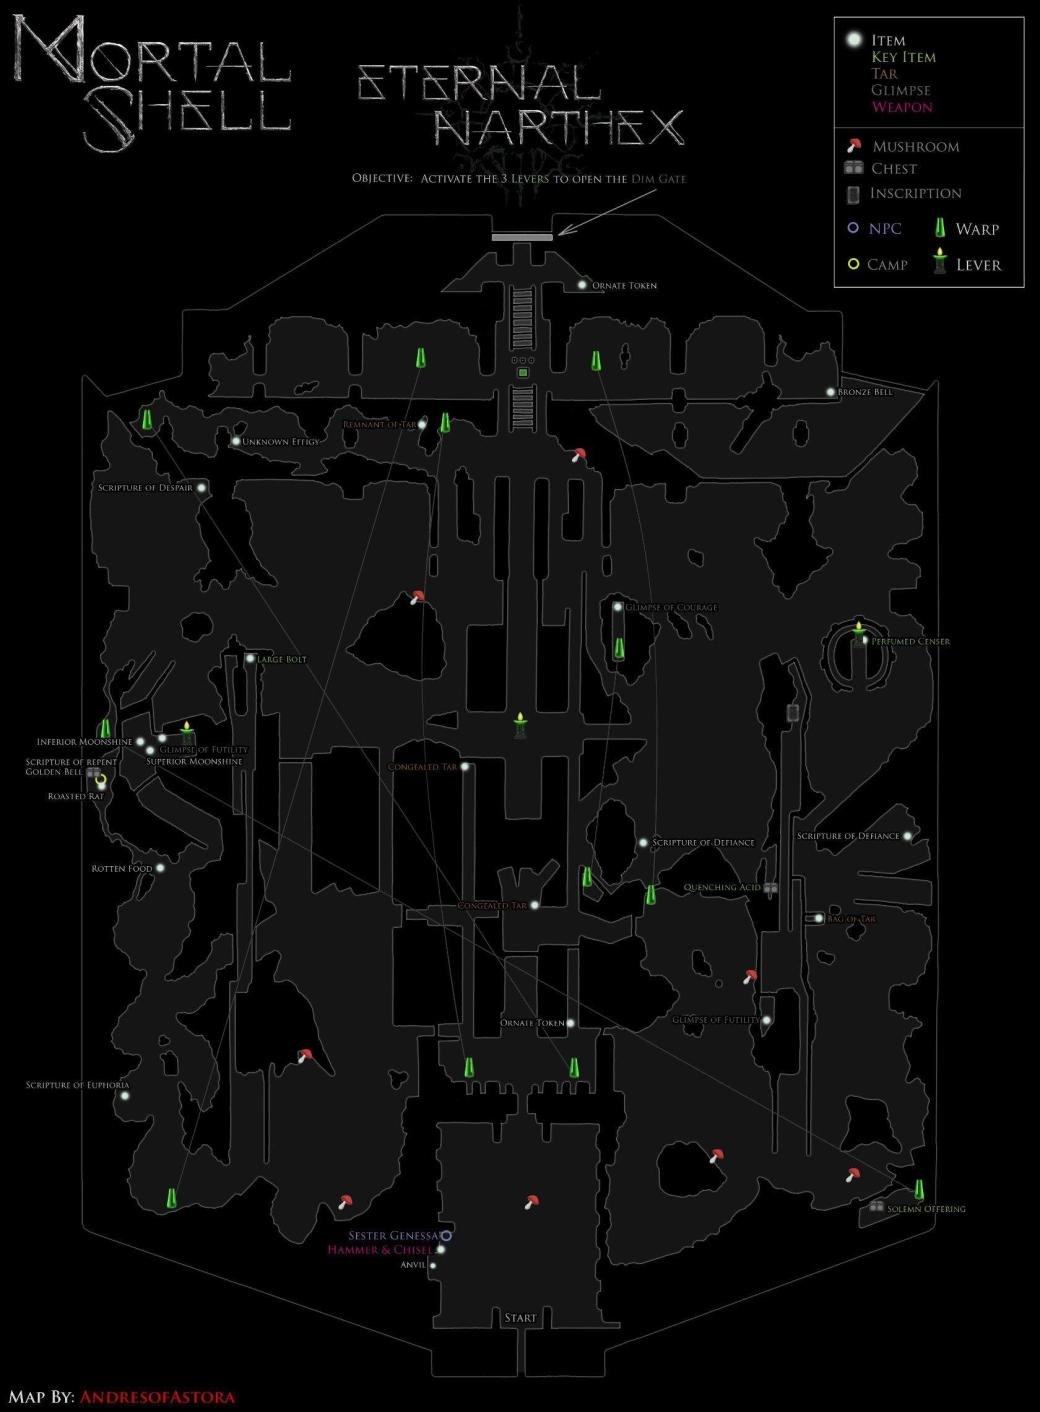
5: Seat of Infinity
Eternal Narthex
- Make sure to activate the 3 Levers in order to access the Dim Gate
- Warp points only have 1 destination and can be used either way
- Lots of side nooks amongst the numerous columns, most leading to nothing
- The warp point with the shortest traverse distance can be reached by dropping below the major ground level
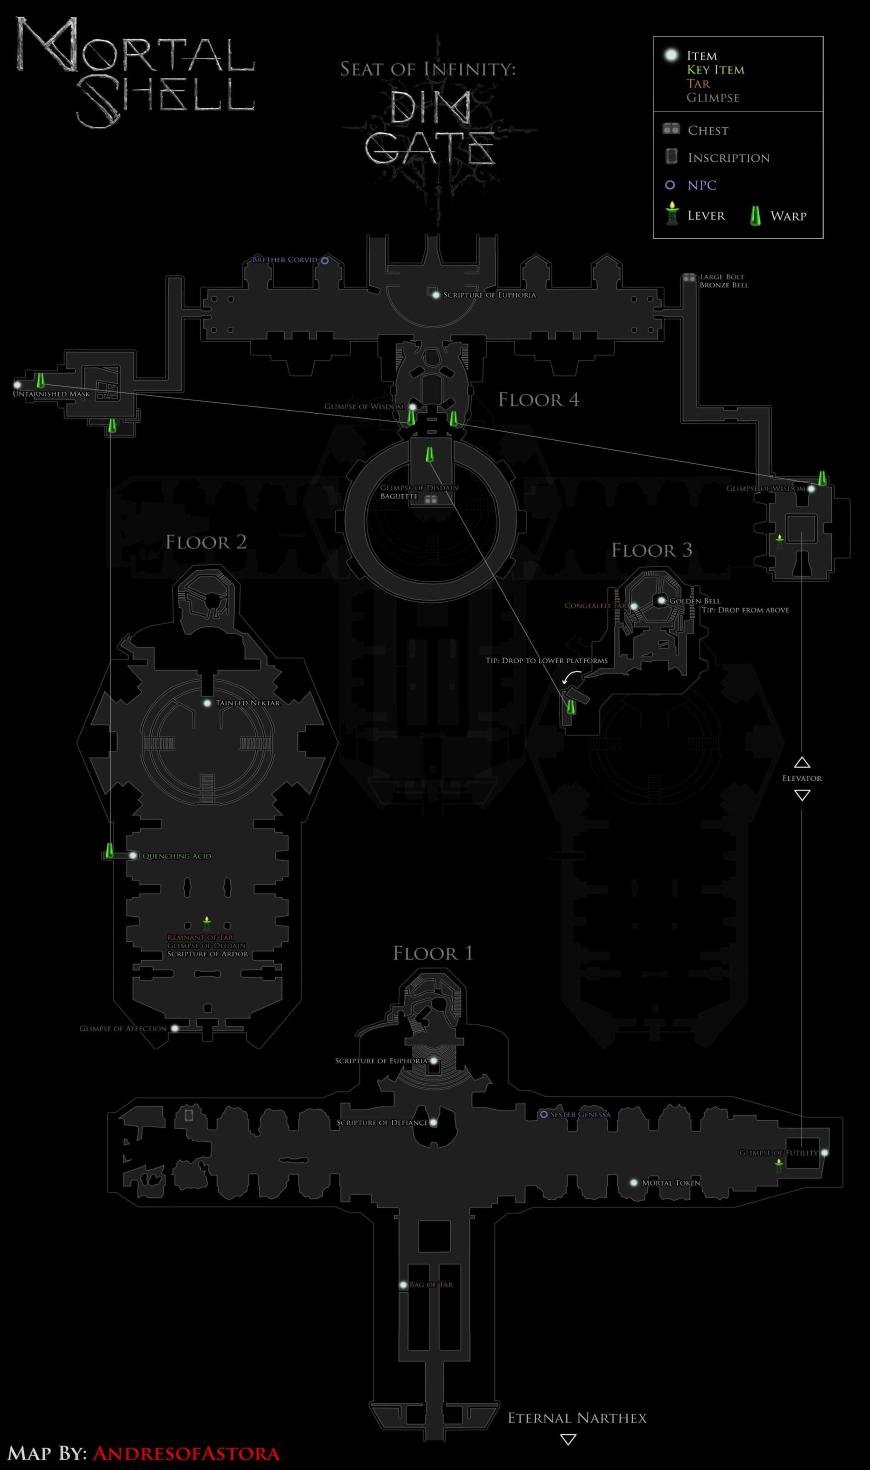
6: Dim Gate
- As the area is quite vertical, therefore, it was a bit tough to design a top-down view
- Players can now see both the faint blueprints of lower levels and how they fit together.
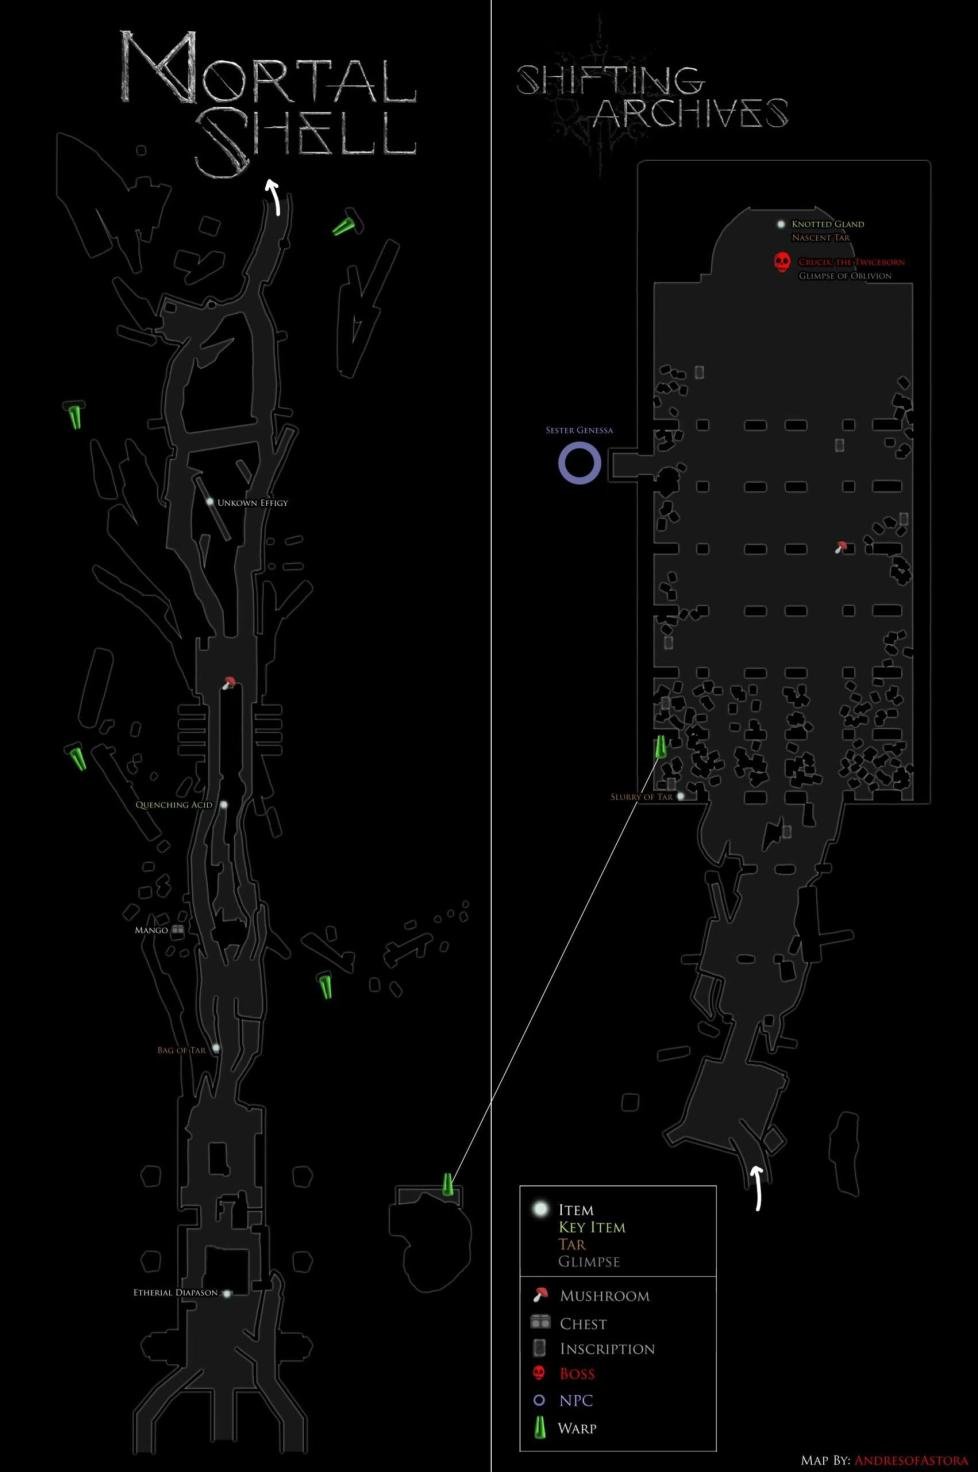
7: Dim Gate / Shifting Archives
- It is vital to mention that the Chest with crucial drop recommends Eredrim Vessel (10/10 durability).
- As shifting Archives is the last big room then it is better for you to drink the Nektar to challenge the boss, and the Gland will be revealed next
- The area will change on your way out the way you prefer because the warps are now in position.